and the culprit is banned from the painting area (which was somewhat difficult considering the bungalow in its entirety is a painting area)

but on to the real accomplishments from the past weekend :: fixing up the lower kitchen cabinets. remember under the sink before?

just needed a replacement floor in the form of cabinet grade 1/2" plywood.

cut in two sections made it simple to pop the new cabinet floor into place.

caulked & painted (first coat only at this point) it's fresh & new. {just a side note - will soon do a full post about the wonders of caulking and how it can change. your. life.}
on to the cabinets on the other side. before, the floor was completely missing, as this cabinet supposedly used to house a small hot water heater.

popping in this plywood floor looks a lot easier than it was to actually accomplish. it involved first building a level platform underneath with scraps of old wood. also notice the old tin stove pipe poking up through the cabinet on the right.
simple tin snips did the job to cut it down enough to lay the piece of plywood right over it.
if you click on the below photo to enlarge it you can see how we have caulked {<3}>
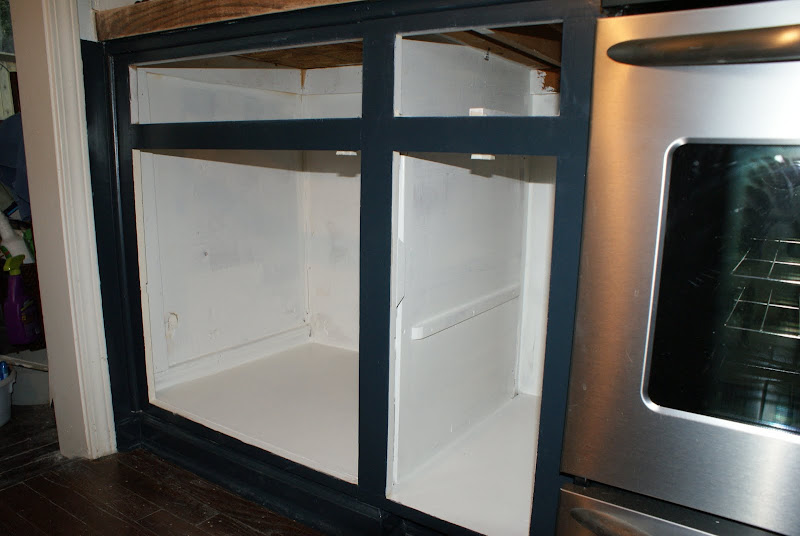
finally dear reader, do you remember promises of big plans for the huge hole left by the old wall oven? confession, after much discussion, we opted out of original big plans-which were to create a lattice wine rack and wine glass storage {yes, i know, would have been so neat}- for something a bit more practical. after living in the bungalow for a month & change, come to find out there is no logical pantry space. so...
newly realized skilled carpenter, b, cut bottom & side for our new pantry {this is 3/4" plywood -still cabinet grade- in case you were wondering.}
adding a 3/4" square trim piece to the raw front edges of the wood adds finishing touches and helps to blend seams with original kitchen. b added support in the form of quarter round and a piece of 3" wood at the top. a shelf provides better use of the space {here just nailed in pieces of the 3/4" trim on either side and topped it with the shelf, so it is removable if you like}
and painted, it blends right in. plans, at least for now, are to stick in a spring rod with a cafe curtain {perhaps an old grain sack?} to keep it from cluttering up the kitchen. eventually there may be moves made to create cabinet doors {thinking with old windows maybe?} but for now, we have bigger priorities...
also, apologies again for poor photo quality. it seems photos are often taken in the evenings when the light is never optimal.
still more to share from the past weekend...soon.


No comments:
Post a Comment