
and let me tell you, you can do it too. here's how we started in the corner with every other subway tile cut in half to give us the beginning layout for a bricked pattern. those green circle things are the spacers and are important in keeping the tile from sliding.

first you coat the wall with adhesive which is a very similar consistency to spackle and not very sticky, so it's easy to clean up if you are a messy tiler. the tool here has grooves in it to give the tiles a greater surface area on which to stick. {note-if you are laying larger tiles the tool you use should have larger grooves} you can also see in this photo the skinny aqua glass tile in the middle with smaller white spacers since the green circle ones were too big. glass tile is much more expensive than subway tile so this is a way to get a more unique look that is still low cost.
and here's the sink side waiting with all the spacers for the adhesive to dry overnight

another view.

the trickiest part of tiling is tiling the areas that are smaller than a full sized tile.

here's the tool we used to cut the tile to fit in all those smaller spaces. cutting tile sounds intimidating but it's really easy and this tool {i forget what it's called...tile cutter?} is available at lowes for less than $20 {though if you need a bigger one for larger tiles, it increases in price as you increase in size. but i think even the biggest sized one was under $75} basically what you do is measure the tile, mark it with a wax pencil, score it with the tile cutter...

and then use the tool to snap the tile along the line you just scored.

here's a zoomed out view of the workspace. the small bucket of adhesive on the left was more than plenty for both sides of our kitchen. also note the green handled tool on the right corner of the counter. these are tile nippers and are really useful for cutting tile to go around outlets.

and finally a view without green spacers.

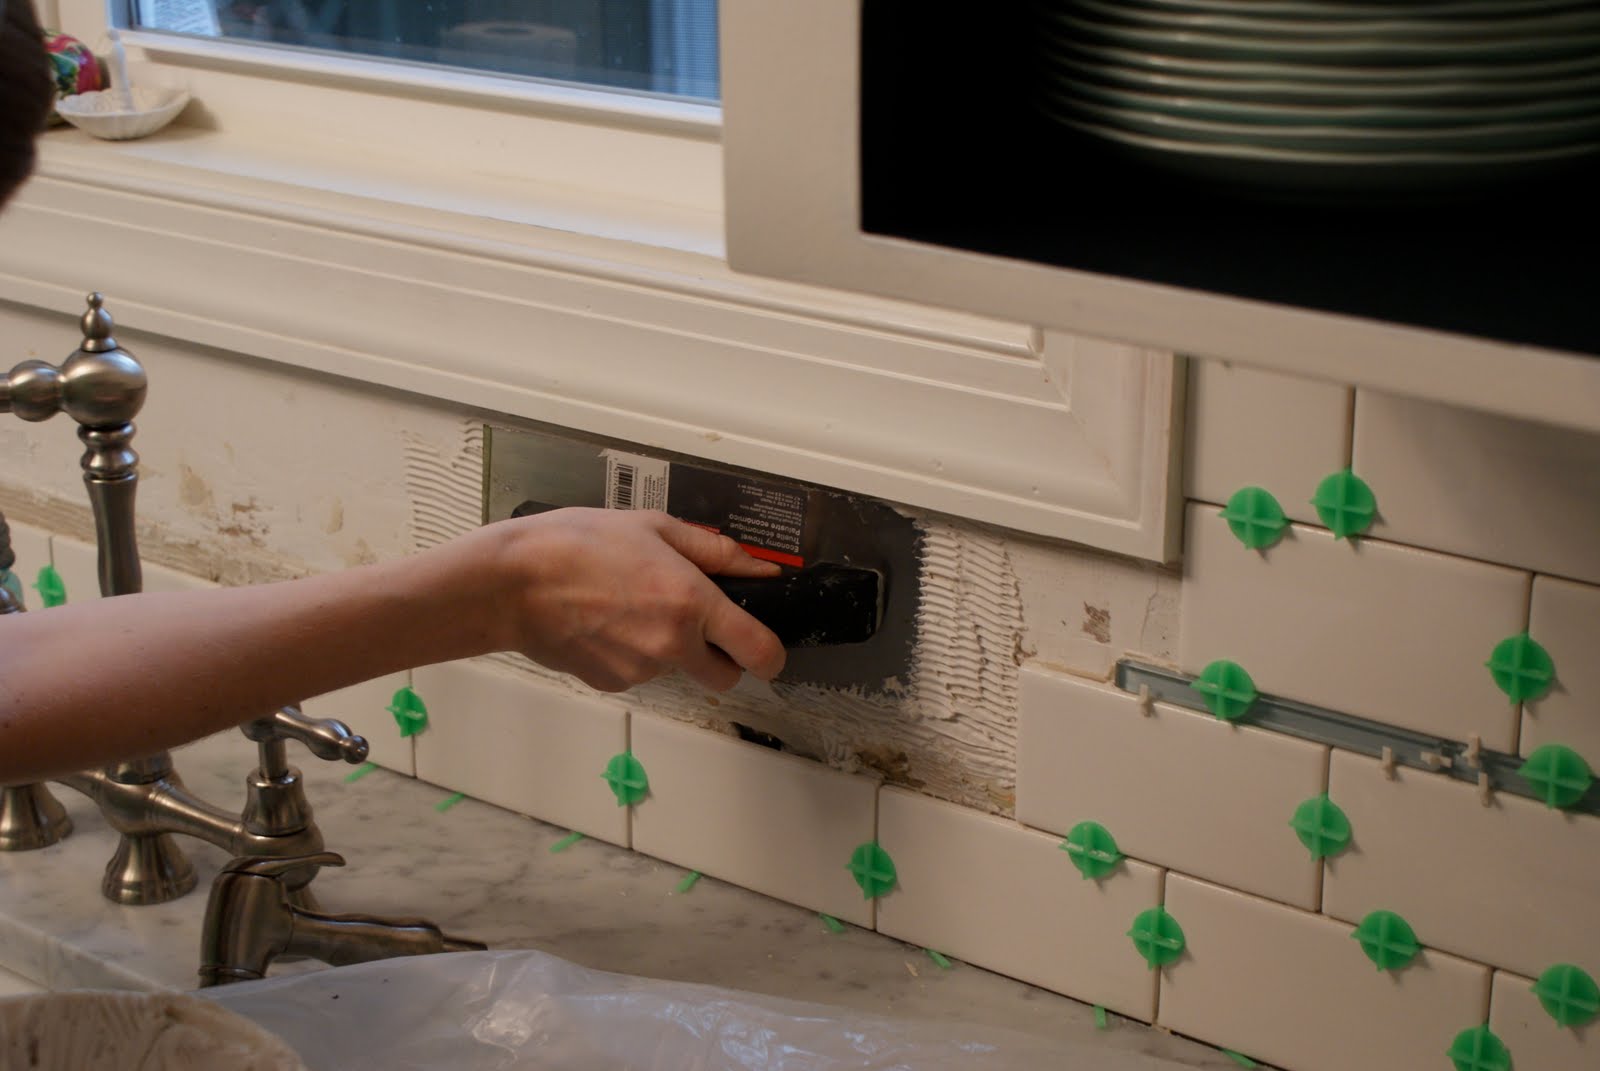
as for the outlets, they are by far the biggest pain of tiling. one of the good things though is that you can lay tile right over imperfections of the wallboard.

here are a few close-ups of tiling around the outlets & switches. oh note that the bottom metal part on the outlets/switches has to go over the tile. meaning you have to unscrew it and then fit the tile behind it. otherwise, the tile wouldn't lay flat and the outlet would be too far recessed.

the cuts definitely don't have to be perfect or even because...

you just pop the covers over them and no one ever sees.

more to come in the world of grouting!
have a wonderful weekend! sorry for the lack of posts this week, have been having trouble with the blogger website.
1 comment:
Swinny the kitchen is gorgeous. I love the way you incorporate the blue tile. Also, I want that blue mason jar soap dispenser. Did you make that?
Post a Comment